有了上一篇的基础,现在就可以来将实现了,其实LVS配置起来真的很简单,但是要理解它到底怎么运行的还是比较困难,别以为看了我那篇LVS理论知识就能了解LVS的实质了,差的远呢。。扯远了,回到正题。
LVS-NAT实现
架构图
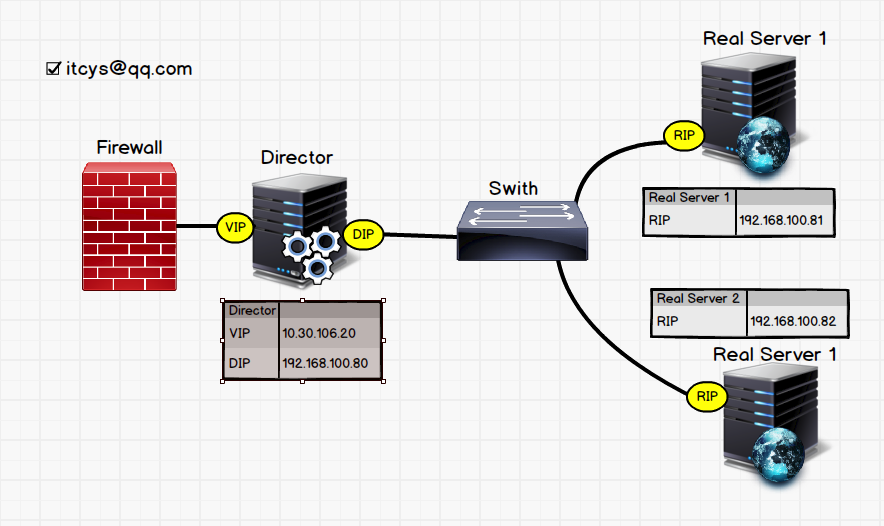
Director
1、环境搭建
启用forward功能
[root@Director ~]# vim /etc/sysctl.conf //修改配置文件
 net.ipv4.ip_forward = 1
[root@Director ~]# sysctl -p   //让配置文件生效
net.ipv4.ip_forward = 1
net.ipv4.conf.default.rp_filter = 1
net.ipv4.conf.default.accept_source_route = 0
kernel.sysrq = 0
kernel.core_uses_pid = 1
net.ipv4.tcp_syncookies = 1
kernel.msgmnb = 65536
kernel.msgmax = 65536
kernel.shmmax = 68719476736
kernel.shmall = 4294967296
安装ipvsadm
[root@Director ~] yum -y install ipvsadm
设置VIP
[root@Director ~] ifconfig eth0:0 10.30.106.20/24 up
测试是否启用
imac:~ cys$ ping -c3 10.30.106.20
PING 10.30.106.20 (10.30.106.20): 56 data bytes
64 bytes from 10.30.106.20: icmp_seq=0 ttl=64 time=0.202 ms
64 bytes from 10.30.106.20: icmp_seq=1 ttl=64 time=0.172 ms
64 bytes from 10.30.106.20: icmp_seq=2 ttl=64 time=0.190 ms

--- 10.30.106.20 ping statistics ---
3 packets transmitted, 3 packets received, 0.0% packet loss
round-trip min/avg/max/stddev = 0.172/0.188/0.202/0.012 ms
2、ipvs规则配置
清除iptables规则(我之前设定了规则)
[root@Director ~]# iptables -F
[root@Director ~]# iptables-save
[root@Director ~]# iptables -L -nv
Chain INPUT (policy ACCEPT 34 packets, 2408 bytes)
 pkts bytes target     prot opt in     out     source               destination

Chain FORWARD (policy ACCEPT 0 packets, 0 bytes)
 pkts bytes target     prot opt in     out     source               destination

Chain OUTPUT (policy ACCEPT 18 packets, 2040 bytes)
 pkts bytes target     prot opt in     out     source               destination
配置ipvs规则
[root@Director ~]# ipvsadm -A -t 10.30.106.20:80 -s rr
[root@Director ~]# ipvsadm -a -t 10.30.106.20:80 -r 192.168.100.81 -m
[root@Director ~]# ipvsadm -a -t 10.30.106.20:80 -r 192.168.100.82 -m
[root@Director ~]# ipvsadm -L -n
IP Virtual Server version 1.2.1 (size=4096)
Prot LocalAddress:Port Scheduler Flags
  -> RemoteAddress:Port           Forward Weight ActiveConn InActConn
TCP  10.30.106.20:80 rr
  -> 192.168.100.81:80            Masq    1      0          0
  -> 192.168.100.82:80            Masq    1      0          0
Real Server上面搭建Web服务,并设置测试页之后启动 网关指向DIP
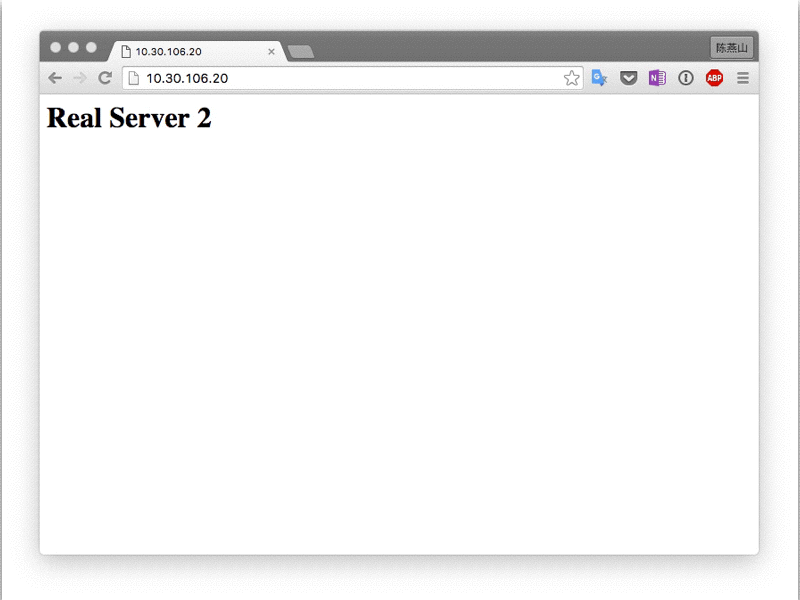
成功页面
LVS-DR
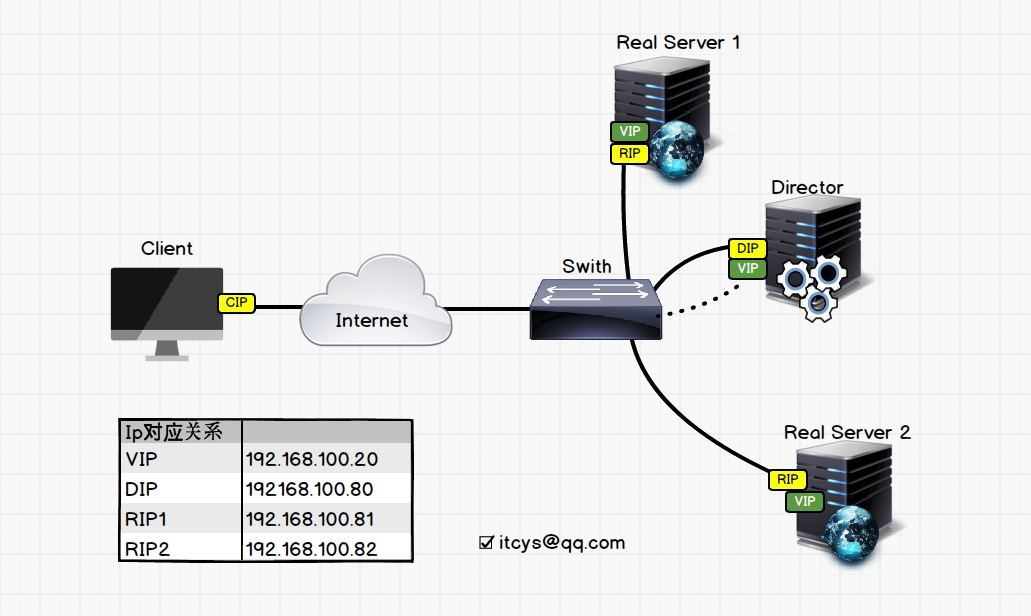
Director:
配置VIP
[root@Director ~]# ifconfig eth0:0 192.168.100.20 netmask 255.255.255.255 broadcast 192.168.100.20 up
[root@Director ~]# route add -host 192.168.100.20 dev eth0:0
配置
[root@localhost ~]# ipvsadm -A -t 192.168.100.20:80 -s wrr
[root@localhost ~]# ipvsadm -a -t 192.168.100.20:80 -r 192.168.100.81 -g -w 3
[root@localhost ~]# ipvsadm -a -t 192.168.100.20:80 -r 192.168.100.82 -g -w 1
Real Server 配置
[root@localhost ~]# echo 1 > /proc/sys/net/ipv4/conf/all/arp_ignore
[root@localhost ~]# echo 1 > /proc/sys/net/ipv4/conf/eth0/arp_ignore
[root@localhost ~]# echo 2 > /proc/sys/net/ipv4/conf/eth0/arp_announce
[root@localhost ~]# echo 2 > /proc/sys/net/ipv4/conf/all/arp_announce
[root@localhost ~]# ifconfig lo:0 192.168.100.20 netmask 255.255.255.255 broadcast 192.168.100.20 up
[root@localhost ~]# route add -host 192.168.100.20 dev lo:0
[root@localhost ~]# route add default gw 192.168.100.1
配置完成
测试
imac:~ cys$ ab -c100 -n1000 192.168.100.20/index.html
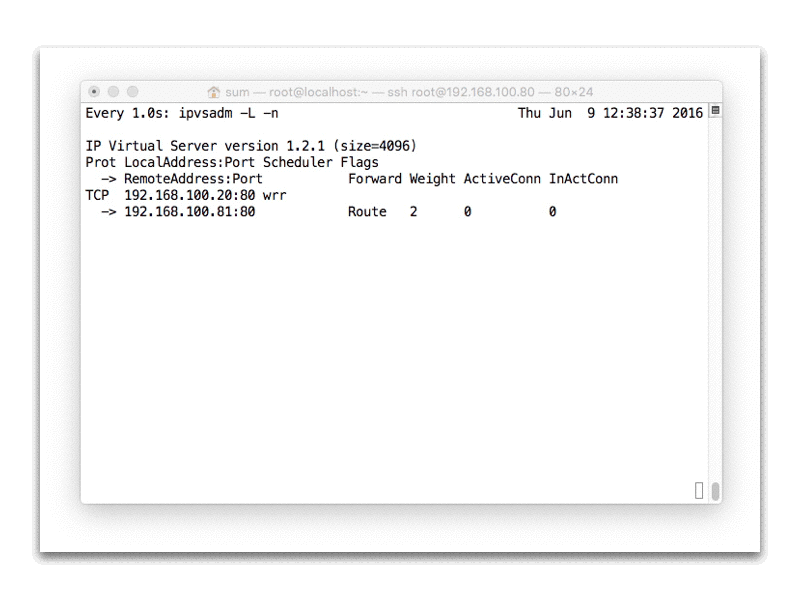
效果
[root@localhost ~]# ipvsadm -L -n --stats
IP Virtual Server version 1.2.1 (size=4096)
Prot LocalAddress:Port               Conns   InPkts  OutPkts  InBytes OutBytes
  -> RemoteAddress:Port
TCP  192.168.100.20:80                1281     6827        0   470641        0
  -> 192.168.100.81:80                 961     5033        0   347911        0
  -> 192.168.100.82:80                 320     1794        0   122730        0
Real Server 1 测试页的出现频率是 Real Server 2 的三倍,基本就等同权重比
脚本
#!/bin/bash
#
# lvs-dr        Startup script for the LVS Real Server
#
# chkconfig: - 75 20
#
# Authon:Yanshan Chen  Email:[email protected] Blog:itcys.top
#
# date:2016-06-14
#
# LVS-DR Real Server

VIP=192.168.100.20

start(){
	/sbin/ifconfig lo down
	/sbin/ifconfig lo up

	echo 1 >/proc/sys/net/ipv4/conf/eth0/arp_ignore
	echo 1 >/proc/sys/net/ipv4/conf/all/arp_ignore
	echo 2 >/proc/sys/net/ipv4/conf/eth0/arp_announce
	echo 2 >/proc/sys/net/ipv4/conf/all/arp_announce

	/sbin/ifconfig lo:0 $VIP netmask 255.255.255.255 broadcast $VIP up
	/sbin/route add -host $VIP dev lo:0
}

stop(){
	echo 0 >/proc/sys/net/ipv4/conf/eth0/arp_ignore
	echo 0 >/proc/sys/net/ipv4/conf/all/arp_ignore
	echo 0 >/proc/sys/net/ipv4/conf/eth0/arp_announce
	echo 0 >/proc/sys/net/ipv4/conf/all/arp_announce

	/sbin/ifconfig lo down
}

status(){
	ifconfigIP=`ifconfig lo:0 | grep "inet addr" | cut -f2 -d":" | cut -f1 -d" "`
	netstatIP=`netstat -rn | grep lo | grep $VIP | cut -d" " -f1`
	if [ -z $netstatIP ]; then
		echo -e "LVS Real Server is \033[031m Stopped!!!\033[0m"
        	RETVAL=1
	else
		if [ $VIP == $ifconfigIP ]; then
			echo -e "LVS Real Server is \033[32m Running...\033[0m"
			RETVAL=0
		else
			echo -e "LVS Real Server is \033[31m Stopped!!!\033[0m"
			RETVAL=1
		fi
	fi
}


case $1 in
	start )
		status > /dev/null
		if [ 0 -ne $RETVAL ]; then
			start
			echo -e "Start LVS Real Server \033[032m OK !!!\033[0m"
		else
			echo -e "LVS Real Server is \033[036m Running...\033[0m"
		fi
			;;
	stop )
		status > /dev/null
		if [ 0 -eq $RETVAL ]; then
			stop
			echo -e "Stop Real Server \033[032m OK !!!\033[0m"
		else
			echo -e "LVS Real Server is \033[036m Stopped\033[0m"
		fi
			;;
	restart )
		stop
		sleep 1
		start
		echo -e "Restart Real Server\033[032m OK !!!\033[0m"
		;;
	status )
		status
		;;
	*)
		echo "Usage: lvs {start|stop|restart|status}"
		;;
esac
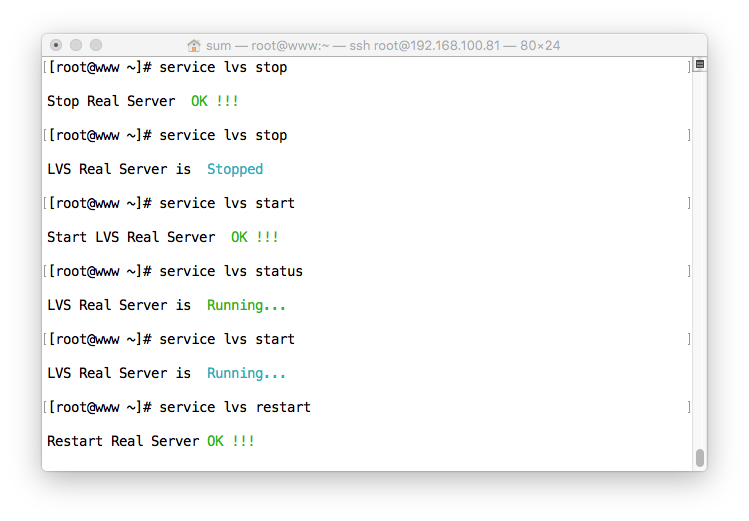
使用方法
[root@www ~]# cp lvs /etc/rc.d/init.d/
[root@www ~]# chmod +x /etc/rc.d/init.d/lvs
[root@www ~]# chkconfig --add lvs
[root@www ~]# chkconfig  | grep lvs
lvs            	0:off	1:off	2:off	3:off	4:off	5:off	6:off
[root@www ~]# chkconfig lvs on
[root@www ~]# chkconfig  | grep lvs
lvs            	0:off	1:off	2:on	3:on	4:on	5:on	6:off
[root@www ~]#
效果
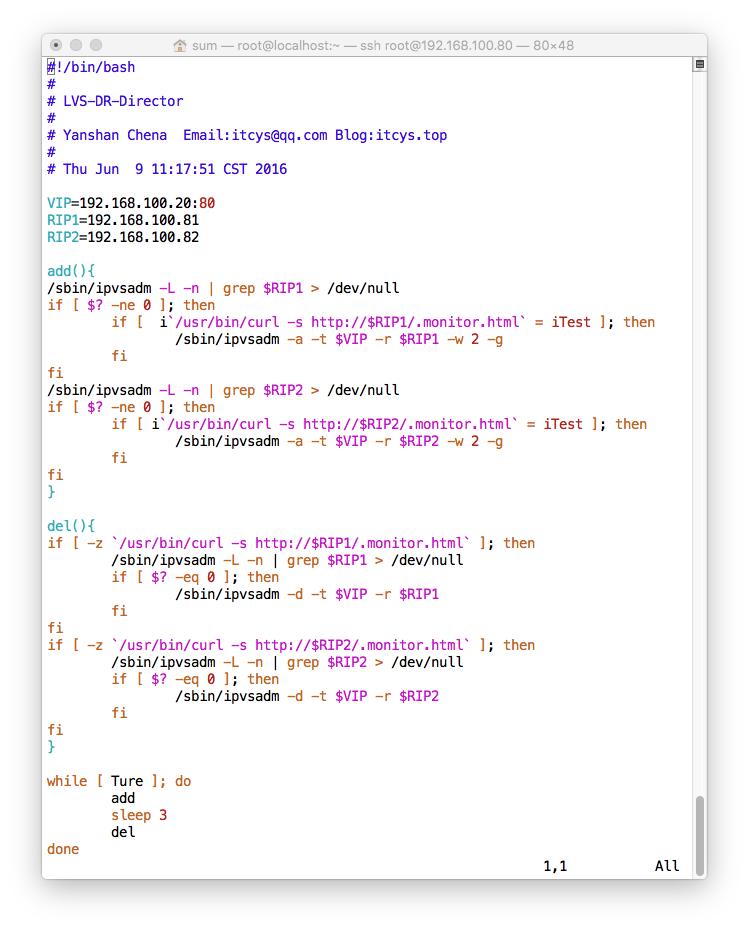
Director上面进行检测Real Server健康脚本,有自动踢除不能服务Real Server和自动加入之前被踢除现在能提供服务Real Server。脚本写的实在太简陋了,根本无法应用到生产环境,我把开始准备好的重试模块和日志模块都剔除了。不想去抄别人的,所以就先搁置了,有时间了再重新写一个。
Real Server先建立测试页
[root@www html]# vim .monitor.html
Test
Director上面直接运行脚本就行了,对了,这个脚本不能和上面的配套使用,要想和上面配置使用,要在上面的脚本stop()里面加上 mv /var/www/html/{. monitor.html,.monitor.html.bak},start()里面也加上类似的话
#!/bin/bash
#
# LVS-DR-Director
#
# Yanshan Chena  Email:[email protected] Blog:itcys.top
#
# Thu Jun  9 11:17:51 CST 2016

VIP=192.168.100.20:80
RIP1=192.168.100.81
RIP2=192.168.100.82

add(){
/sbin/ipvsadm -L -n | grep $RIP1 > /dev/null
if [ $? -ne 0 ]; then
        if [  i`/usr/bin/curl -s http://$RIP1/.monitor.html` = iTest ]; then
                /sbin/ipvsadm -a -t $VIP -r $RIP1 -w 2 -g
        fi
fi
/sbin/ipvsadm -L -n | grep $RIP2 > /dev/null
if [ $? -ne 0 ]; then
        if [ i`/usr/bin/curl -s http://$RIP2/.monitor.html` = iTest ]; then
                /sbin/ipvsadm -a -t $VIP -r $RIP2 -w 2 -g
        fi
fi
}

del(){
if [ -z `/usr/bin/curl -s http://$RIP1/.monitor.html` ]; then
        /sbin/ipvsadm -L -n | grep $RIP1 > /dev/null
        if [ $? -eq 0 ]; then
                /sbin/ipvsadm -d -t $VIP -r $RIP1
        fi
fi
if [ -z `/usr/bin/curl -s http://$RIP2/.monitor.html` ]; then
        /sbin/ipvsadm -L -n | grep $RIP2 > /dev/null
        if [ $? -eq 0 ]; then
                /sbin/ipvsadm -d -t $VIP -r $RIP2
        fi
fi
}

while [ Ture ]; do
        add
        sleep 3
        del
done
没有代码高亮实在烦,上图好看些
效果
一台Real Server上面关闭开启httpd,然后在Director上的效果